VPA Address in Google Pay
The Virtual Payment Address (VPA) is a significant component of the Unified Payments Interface (UPI) system in India, designed to simplify digital transactions.
A VPA serves as a unique identifier for users, allowing them to send and receive money without revealing sensitive bank account details.
This feature enhances security and convenience, making it easier for individuals to manage their financial transactions through various UPI-enabled apps, including Google Pay.
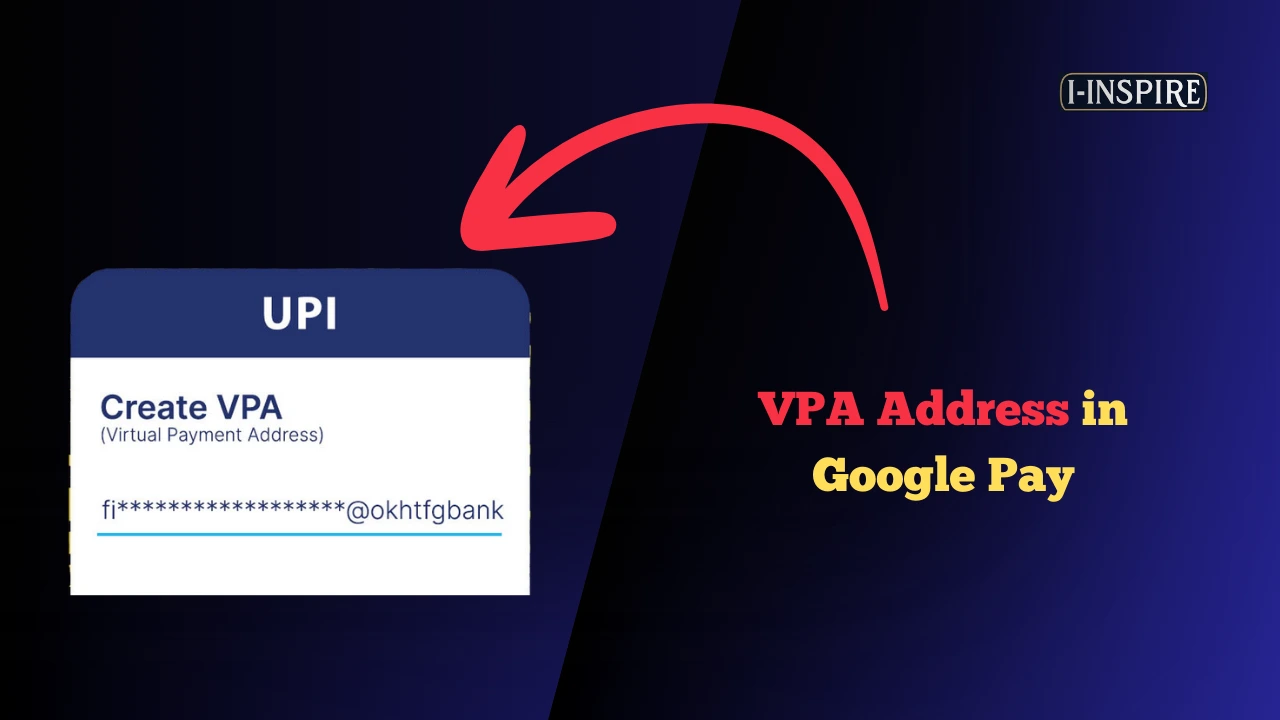
In Google Pay, users can easily locate their VPA, which typically follows a format like “username@bankname.”
This identifier facilitates seamless transactions and helps users avoid the hassle of remembering multiple bank account numbers.
With the increasing popularity of digital payments, understanding how to use and manage a VPA in Google Pay has become essential for many users.
Also Read:
Fake Google Pay Screenshot
How to Find Your CRED UPI ID
UPI Cash Withdrawal ATM Near Me
Delete Your Google Pay Transaction History
Google Pay Pending Transaction Error
How to Fix Error Code U28 in Google Pay
How to Hide Mobile Number in Google Pay
VPA Address in Google Pay
As digital payments continue to grow, the role of VPA in ensuring secure and efficient transactions will likely expand, making it a crucial aspect of the modern financial landscape in India.
This article will explore how to find and utilize your VPA in Google Pay, ensuring you can navigate your transactions with ease and confidence.
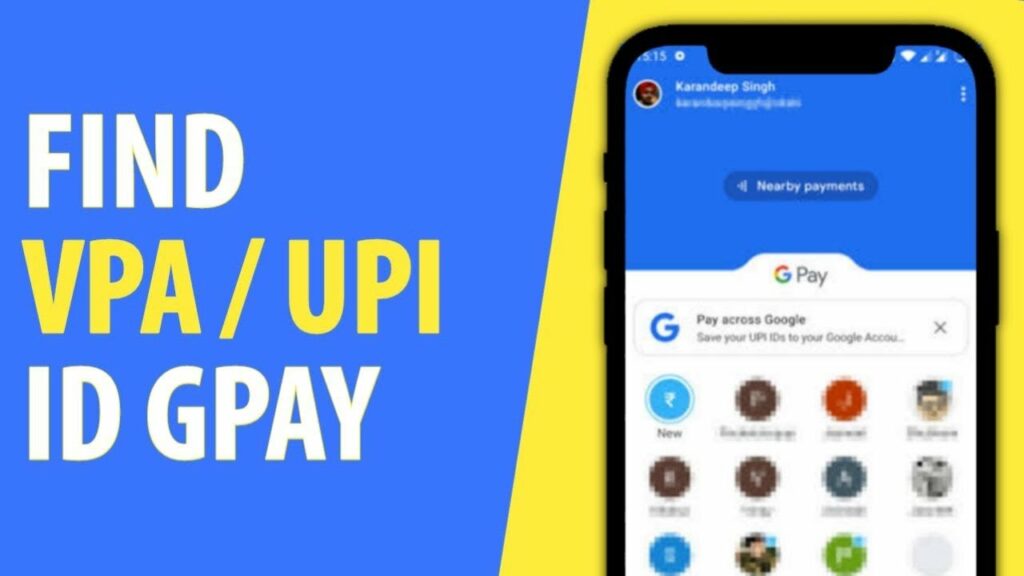
To create and find a Virtual Payment Address (VPA) in Google Pay, follow these detailed steps:
How to Create VPA in Google Pay
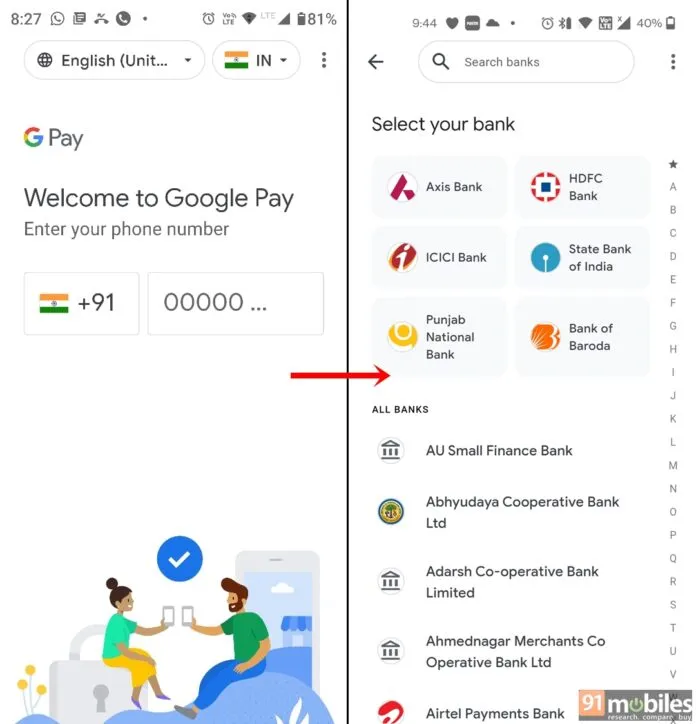
- Download and Install Google Pay: Begin by downloading the Google Pay app from the Google Play Store or Apple App Store.
- Launch the App: Open the app and sign in using your mobile number. Ensure that this number is linked to your bank account.
- Link Your Bank Account: Select your bank from the list provided. You will need to verify your bank account by entering the last six digits of your debit card and the card’s expiry date. An OTP will be sent to your registered mobile number for verification.
- Create Your VPA: After linking your bank account, you will be prompted to create your VPA. Google Pay typically generates a default VPA based on your Gmail ID, but you can customize it. A common format for a VPA is yourname@bankname.
- Verification: Once you create your VPA, it may require verification. This usually involves confirming your ownership of the linked bank account through an OTP.
- Start Transacting: After your VPA is set up, you can use it to send and receive money seamlessly through UPI-enabled transactions.
| Step | Description |
|---|---|
| 1 | Download the Google Pay app: Install the Google Pay app from the Google Play Store or Apple App Store. |
| 2 | Open the app: Launch Google Pay on your device. |
| 3 | Enter your mobile number: Input your mobile number to start the registration process. |
| 4 | Select your bank: Choose the bank account linked to your mobile number from the list provided. |
| 5 | Verify your mobile number: You will receive an OTP (One-Time Password) via SMS or email for verification. Enter the OTP to proceed. |
| 6 | Create your UPI ID (VPA): After verification, you can create your UPI ID. Google Pay typically generates a default UPI ID based on your Gmail ID, but you can customize it if desired. |
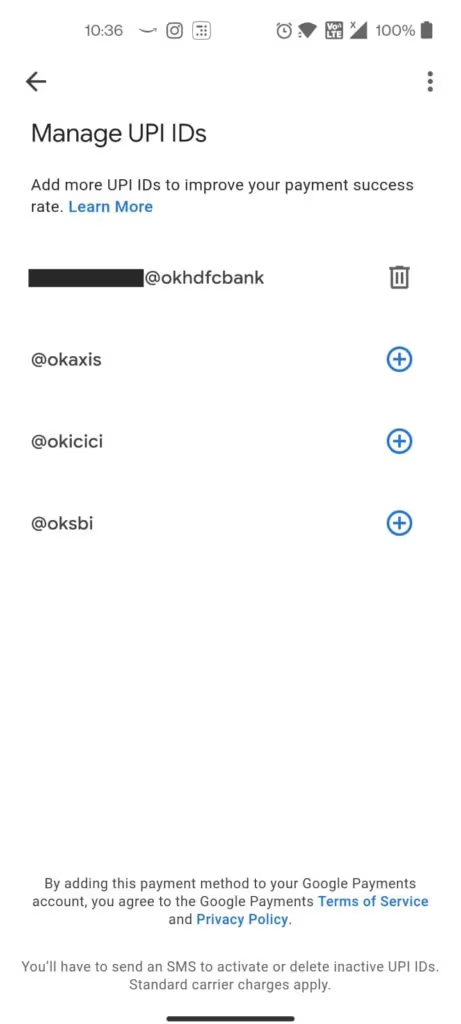
| 7 | Manage UPI IDs: To add or view your UPI IDs, tap on your profile picture at the top right, go to “Bank account,” and select “Manage UPI IDs.” You can add up to 4 UPI IDs for the same bank account. |
| 8 | Start using your VPA: Once your UPI ID is created, you can use it to send and receive money through UPI-enabled transactions. |
How to Find VPA in Google Pay
To locate your VPA in Google Pay, follow these steps:
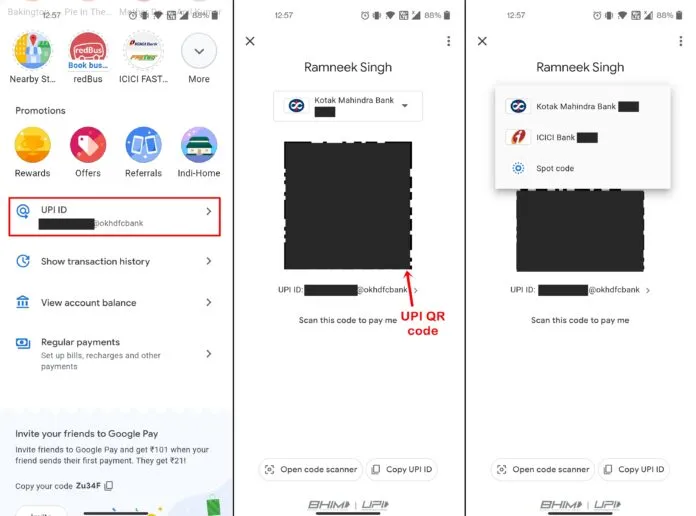
- Open Google Pay: Launch the app on your device.
- Access Your Profile: Tap on your profile picture located at the top right corner of the screen.
- Navigate to Bank Accounts: Select the Bank account option from the menu.
- Select Your Bank Account: Choose the bank account for which you want to view the VPA.
- Manage UPI IDs: Tap on Manage UPI IDs. Here, you will see a list of all UPI IDs associated with your bank account.
- Locate Your VPA: Under your bank account details, your VPA will be displayed. It will typically follow the format yourname@bankname.
Using your VPA simplifies transactions, allowing you to send and receive money without needing to share sensitive bank details.
This unique identifier enhances security and convenience in digital payments, making it easier for users to engage in financial transactions through Google Pay.
How Does a VPA Work in UPI Transactions?
A Virtual Payment Address (VPA) is a unique identifier used in the Unified Payments Interface (UPI) system in India, designed to facilitate secure and convenient digital transactions.
Developed by the National Payments Corporation of India (NPCI), UPI allows users to transfer funds instantly between bank accounts using mobile devices.
The VPA acts as a substitute for sensitive bank account details, enabling users to send and receive money without disclosing their actual bank account numbers.
Creation of VPA
To create a VPA, users must register with a bank or a UPI-enabled payment service provider.
During registration, users select a unique VPA, typically formatted as “username@bank” or “username@paymentprovider.”
For example, a VPA could be “john.doe@hdfcbank” or “jane123@upi”.
Linking to Bank Account
After creating a VPA, users link it to their bank accounts.
This process involves associating the VPA with the respective bank account, which allows the VPA to serve as the address for sending and receiving funds.
Once linked, the VPA becomes the sole identifier needed for transactions, eliminating the need to repeatedly enter bank account details.
Transaction Process
To initiate a payment using UPI, the user simply provides their VPA instead of sharing bank account information.
The payer enters the recipient’s VPA, specifies the amount, and authorizes the transaction using a UPI-enabled app.
The UPI system then validates the VPA and routes the transaction to the recipient’s bank account linked to that VPA.
This process is typically instantaneous, allowing for quick fund transfers between accounts.
Advantages of Using a VPA Address in Google Pay
Using a Virtual Payment Address (VPA) in Google Pay offers numerous advantages, making it a preferred choice for digital transactions.
A VPA serves as a unique identifier for users within the Unified Payments Interface (UPI) system, which facilitates seamless money transfers in India.
Security
One of the primary benefits of using a VPA is enhanced security.
By utilizing a VPA, users can avoid sharing sensitive bank account details, such as account numbers and IFSC codes, which reduces the risk of fraud and unauthorized transactions.
The VPA acts as a shield, ensuring that only the unique identifier is visible during transactions, thereby protecting personal banking information from potential threats.
Convenience
The convenience offered by a VPA is significant. Users can send and receive money using just their VPA, eliminating the need to remember complex bank details.
This simplicity is particularly beneficial for frequent transactions, as it allows users to initiate payments quickly and efficiently.
With a VPA, transactions can be completed in just a few taps on a smartphone, making it an ideal option for users who value speed and ease.
Interoperability
A VPA is interoperable across various banks and payment service providers, which means users can transact seamlessly with different institutions.
This interoperability is a key feature of the UPI ecosystem, allowing users to link multiple bank accounts to a single VPA.
As a result, users can manage their finances more effectively without the hassle of switching between different payment apps or remembering multiple account details.
Customization
Another advantage of using a VPA is the ability to customize it according to personal preferences.
Users can choose a VPA that reflects their name or any other identifier, making it easier to share with others.
This personalization not only enhances user experience but also helps in building a recognizable digital identity for transactions.
Accessibility
The VPA system promotes financial inclusion by enabling users, including those who may not have traditional bank accounts, to participate in digital transactions.
With just a smartphone and a VPA, individuals can engage in money transfers, bill payments, and online shopping without needing to visit a bank branch.
This accessibility is crucial in expanding the reach of digital payments, especially in rural and underserved areas.
In conclusion, using a VPA in Google Pay enhances security, convenience, interoperability, customization, and accessibility.
These advantages contribute to the growing popularity of digital payments in India, making transactions simpler and safer for users across the country.
How to Fix Issues with VPA Addresses in Google Pay
Virtual Payment Addresses (VPAs) are unique identifiers used in the Unified Payments Interface (UPI) system to facilitate seamless money transfers.
However, users may occasionally encounter issues with VPAs while using Google Pay. Here are some steps to help you resolve common problems:
Verify VPA Accuracy
Ensure that the VPA you are using is correct. Double-check the recipient’s VPA or your own VPA to ensure there are no typos or errors.
A VPA typically follows the format “username@bankname” or “username@upi”.
Check VPA Linking
Verify that your VPA is properly linked to your bank account. Open the Google Pay app, go to the “Profile” section, and check if your VPA is displayed correctly.
If not, you may need to re-link your VPA to your bank account.
Update Google Pay App
Ensure that you are using the latest version of the Google Pay app. Go to the Play Store (Android) or App Store (iOS) and check for any available updates.
Installing the latest version can help resolve any VPA-related issues caused by outdated software.
Restart Device and Clear Cache
If you are still experiencing problems, try restarting your device. This can help resolve any temporary glitches or issues.
Additionally, clear the cache of the Google Pay app by going to the app settings and selecting the “Clear Cache” option.
Contact Bank or Google Pay Support
If the issue persists, reach out to your bank or the Google Pay support team for further assistance.
Provide them with details about the problem you are facing, such as the specific error message or the VPA you are trying to use.
They can investigate the issue and provide you with a resolution.
Avoid Using Special Characters in VPA
When creating a VPA, it is recommended to use only alphanumeric characters (letters and numbers) and avoid using special characters like spaces, symbols, or emojis.
Using special characters may lead to compatibility issues or difficulties in identifying the VPA.
Ensure Sufficient Funds
Before initiating a transaction, make sure you have sufficient funds in your bank account linked to the VPA. Insufficient funds can result in failed transactions and VPA-related issues.
Wait for Transaction Processing
UPI transactions, including those involving VPAs, can take up to three business days to process.
If you have initiated a transaction and it appears to be stuck, wait for the processing time before taking any further action.
By following these steps, you can effectively resolve most issues related to VPAs in Google Pay.
Remember to keep your VPA information secure and avoid sharing it with anyone to prevent unauthorized access to your UPI transactions.
How Secure is Your VPA Address in Google Pay?
When it comes to the security of your Virtual Payment Address (VPA) or UPI ID in Google Pay, you can rest assured that your payment information is well-protected.
Google Pay employs several layers of security to safeguard your transactions and personal data.
One of the primary security features is data encryption. Your payment information is stored in an encrypted form, which means it can only be accessed when your device is unlocked.
This ensures that even if your device is lost or stolen, your data remains secure.
Another important aspect is screen lock. Before you can add payment cards to Google Pay, you must set up a screen lock on your device.
This could be a PIN, pattern, or password. If you turn off the screen lock, Google Pay will automatically remove your virtual account number from your device for your protection.
Google Pay also uses virtual account numbers to protect your actual account details.
When you make a purchase, your virtual account number is shared with the merchant instead of your real account number. This helps keep your sensitive information safe.
In the event that your device is lost or stolen, you can take immediate action to secure your payment information.
Google Pay allows you to find, lock, or erase your lost device remotely. If you suspect that your Google Account has been compromised, you can follow the steps to secure a hacked or compromised account.
It’s important to note that Google Pay requires verification to make in-store payments when your device is locked.
This ensures that only you can authorize transactions, even if your device falls into the wrong hands.
How to Update Your VPA Address in Google Pay
Updating your VPA Address in Google Pay is a straightforward process. Here’s how you can do it:
- Open the Google Pay app on your device.
- Tap on the profile icon in the top right corner.
- Select “Settings” from the menu.
- Under “Payments,” tap on “Payment methods.”
- Find the payment method you want to update and tap on it.
- Tap on “Edit” next to your **VPA Address.
- Enter your new *VPA Address* and tap “Save.”
That’s it! Your VPA Address has been successfully updated in Google Pay. Remember to use a unique and memorable VPA Address to make transactions easier and more convenient.
Differences Between VPA and Traditional Bank Account Numbers
A Virtual Payment Address (VPA) and a traditional bank account number serve distinct purposes in the realm of digital payments, particularly within the Unified Payments Interface (UPI) system in India.
Understanding their differences is crucial for users navigating the digital payment landscape.
A VPA is a unique identifier that simplifies transactions by acting as an alias for a bank account. It is formatted similarly to an email address, typically following the pattern username@bankname.
This allows users to send and receive money without disclosing sensitive banking information such as account numbers or IFSC codes, enhancing privacy and security during transactions.
In contrast, a traditional bank account number is a specific numerical identifier assigned to an individual’s bank account.
It is used in conventional banking transactions, requiring users to provide detailed information, including the account number and branch code, for fund transfers.
This traditional method can be cumbersome and poses a higher risk of exposing sensitive financial information.
Managing Multiple VPA Addresses in Google Pay
Managing multiple VPAs is a straightforward process in Google Pay and other UPI-enabled applications.
Users can create and link several VPAs to a single bank account, which is beneficial for organizing personal and business transactions separately or enhancing privacy. Here’s how to manage multiple VPAs in Google Pay:
- Open Google Pay: Launch the app on your smartphone.
- Go to Profile: Navigate to the profile section where your current VPA is displayed.
- Create New VPA: Click on the option to add a new VPA. You can choose a unique identifier for this address.
- Verify and Link: After selecting your desired VPA, follow the prompts to verify your identity and link it to your bank account.
- Use Multiple VPAs: Once created, you can easily switch between VPAs for different transactions, allowing for better financial management and privacy control.
By utilizing VPAs, users can enjoy a more secure and efficient way to handle digital payments, while the ability to manage multiple addresses enhances flexibility in financial transactions.
FAQs
1. What is a VPA (Virtual Payment Address)?
A VPA is a unique identifier that enables users to send and receive money via the UPI (Unified Payments Interface) system. It acts as an ID independent of your bank account number and other details.
2. How do I find my VPA in Google Pay?
To find your VPA in Google Pay:
- Open the Google Pay app.
- Click on your profile (the circle with your photo) at the top of the home screen.
- Select “Bank account” from the menu.
- Choose the desired account for the VPA.
- Your VPA and UPI IDs will be listed under “UPI IDS“.
3. Can I change my VPA in Google Pay?
Yes, you can modify your UPI ID in Google Pay:
- Click on your profile in the top right corner of the home screen.
- Select “Bank Accounts” from the menu.
- Choose the account whose VPA is being modified.
- Select the VPA that will be paired with the transactional bank account.
- The UPI ID you want to use should have a “+” or a pencil next to it.
4. Is VPA required for UPI transactions?
Yes, a VPA is required to make/receive UPI payments. It is needed to make UPI payments, just as a credit/debit card is required to make card payments.
5. What does a VPA look like?
A typical VPA looks something like “abc@bankname“. The “abc” part can be anything, such as your name, your registered mobile number, or other preferences.
The “bankname” can be the name of the bank your account is held with, the name of the bank the app is associated with, or just the word “upi“.
6. How do I verify my bank account with Google Pay?
After providing your VPA, Google Pay deposits a small amount into the bank account linked to your VPA. To verify:
- Check your bank account transactions for the test amount from Google Pay.
- In your Google Pay account, go to the UPI verification screen.
- Enter the amount Google Pay deposited.
- If the amount matches, your bank account is verified successfully.
7. Is VPA secure for UPI transactions?
UPI transactions through a VPA are secure until the user’s PIN is kept confidential. VPA reduces fraud compared to debit/credit card duplication, but vigilance is still required to tackle financial frauds.
Final Words
In conclusion, the Virtual Payment Address (VPA) is a vital feature of the Unified Payment Interface (UPI) that enhances the safety and ease of digital transactions in India.
By serving as a unique identifier, the VPA allows users to send and receive money without sharing sensitive bank details, thereby improving security.
With Google Pay, managing your VPA is simple and user-friendly.
Users can easily find and modify their VPAs through their profile, enabling the creation of multiple addresses for different bank accounts.
This flexibility ensures that users can tailor their payment experiences to suit their needs.

